As I work on this new comic, I’m still sticking to the same basic pixel art workflow that I established when working on The Botanist (Procreate for sketching and Pixaki for pixeling). But I wanted to zoom out a bit and show a fuller picture of the process.
Step 1: Planning the Story
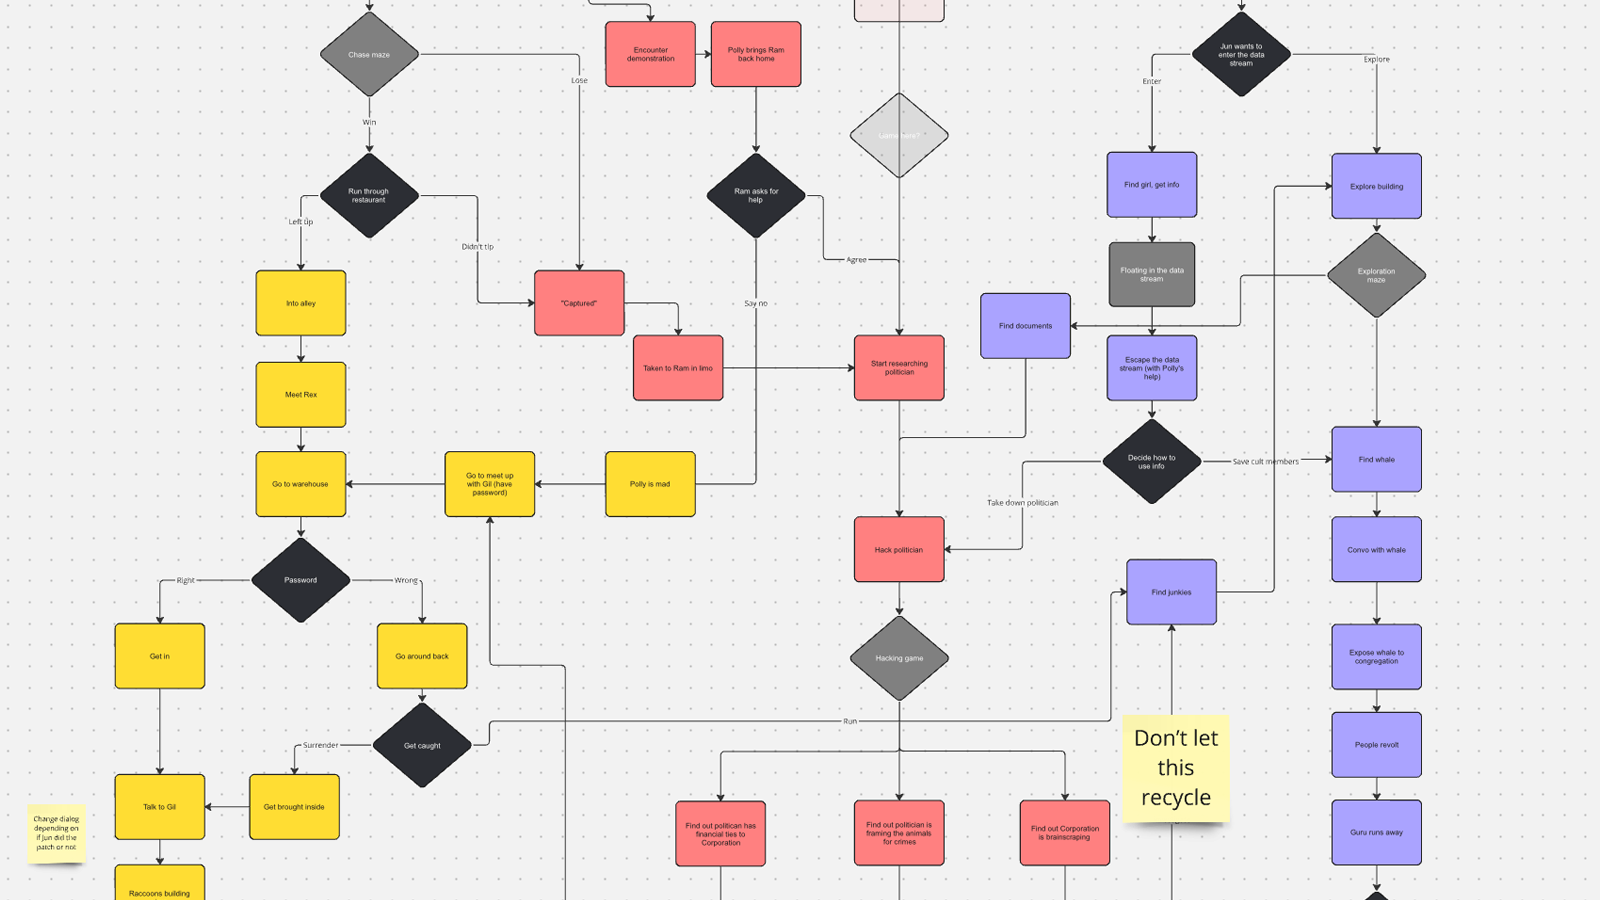
The first step is to plan out the entire story in a wireframe diagram. I used Miro for this, but any drawing or diagramming tool would work.

Here I’m just trying to plan out the storylines in broad strokes. Each node in the diagram represents a story beat, but at this point I’m not thinking about whether that will be a single scene or multiple scenes tied together, just what needs to happen to move the story along.
This is the one step that’s new for this project. Since this will be a branching story, I need to make sure that all the different storylines branch and rejoin at the right points, and that everything will make sense no matter which choices the player makes. I also want to make sure that each story path is roughly the same length, with approximately the same number of interactive elements and minigames.
Since my other games were linear stories, I didn’t feel the need to explicitly diagram this all out. I just kept the rough story idea in my head and skipped to sketching out the scenes (Step 2). Since this story is significantly more complex, I needed to make sure I had the general shape of the story laid out before diving into any of the actual art creation.
Step 2: Sketching Out Scenes
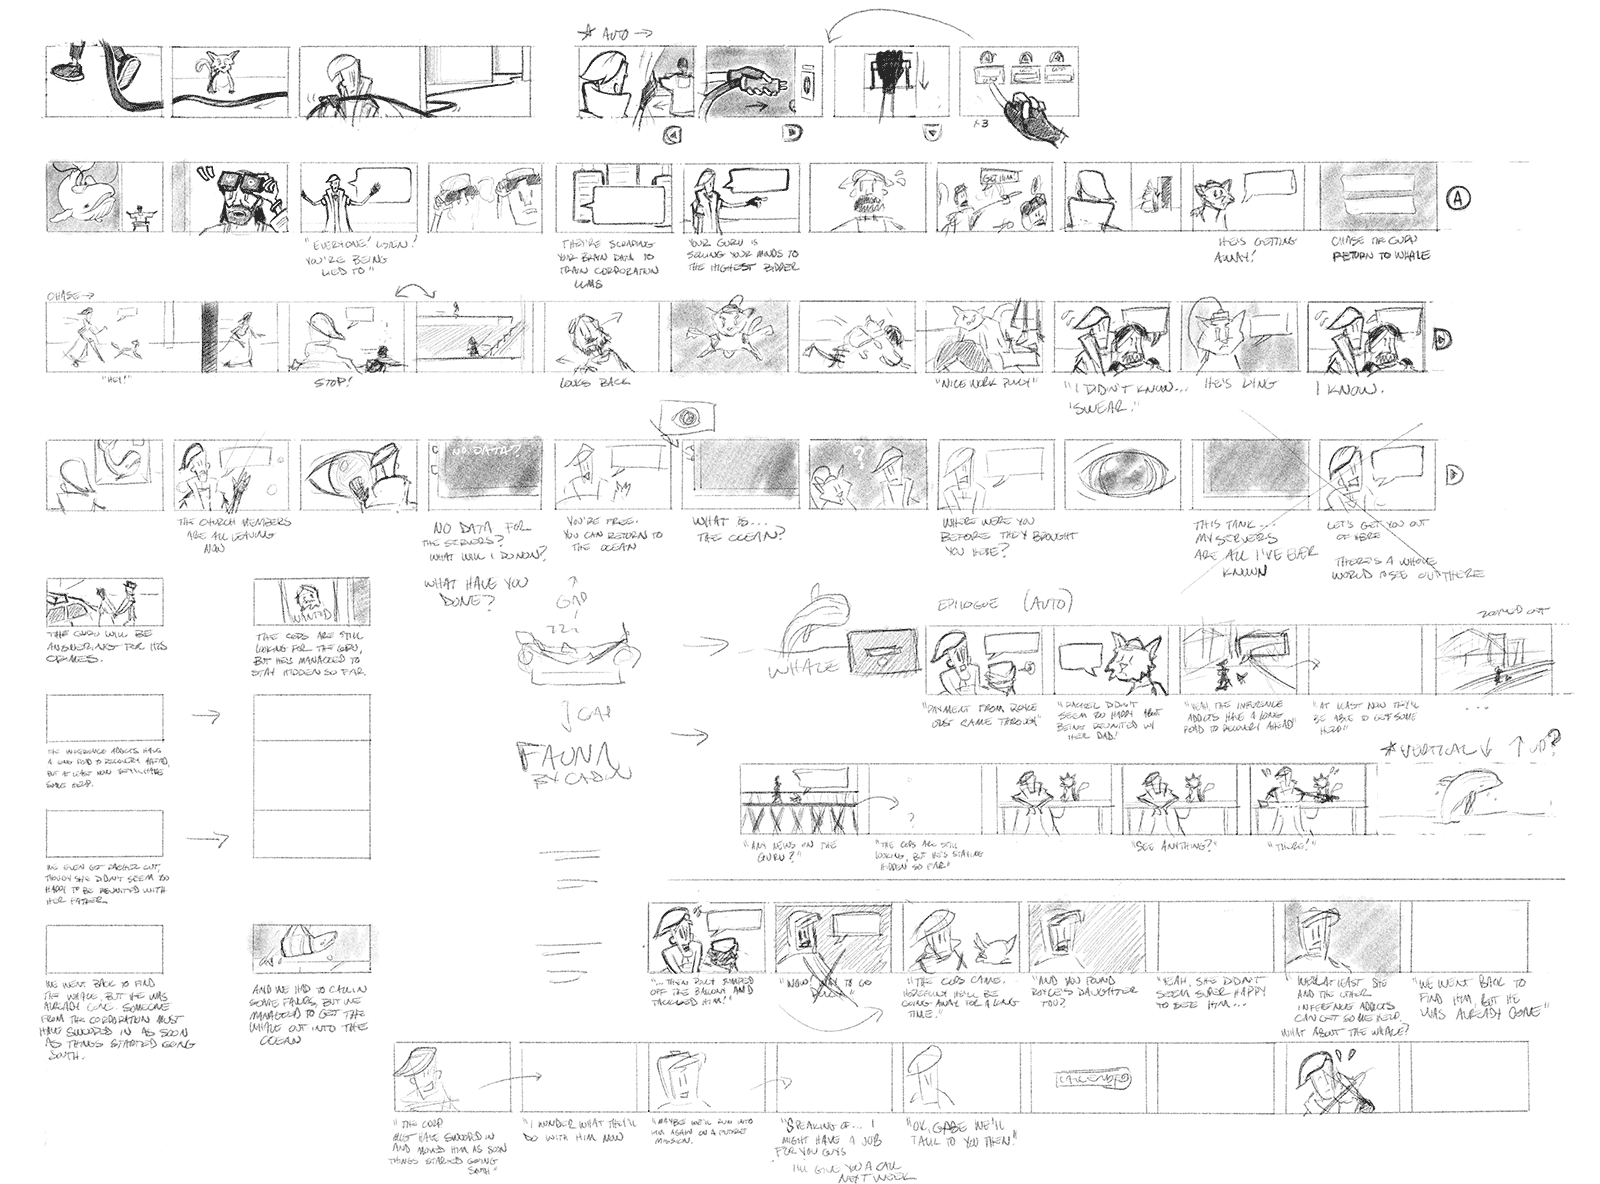
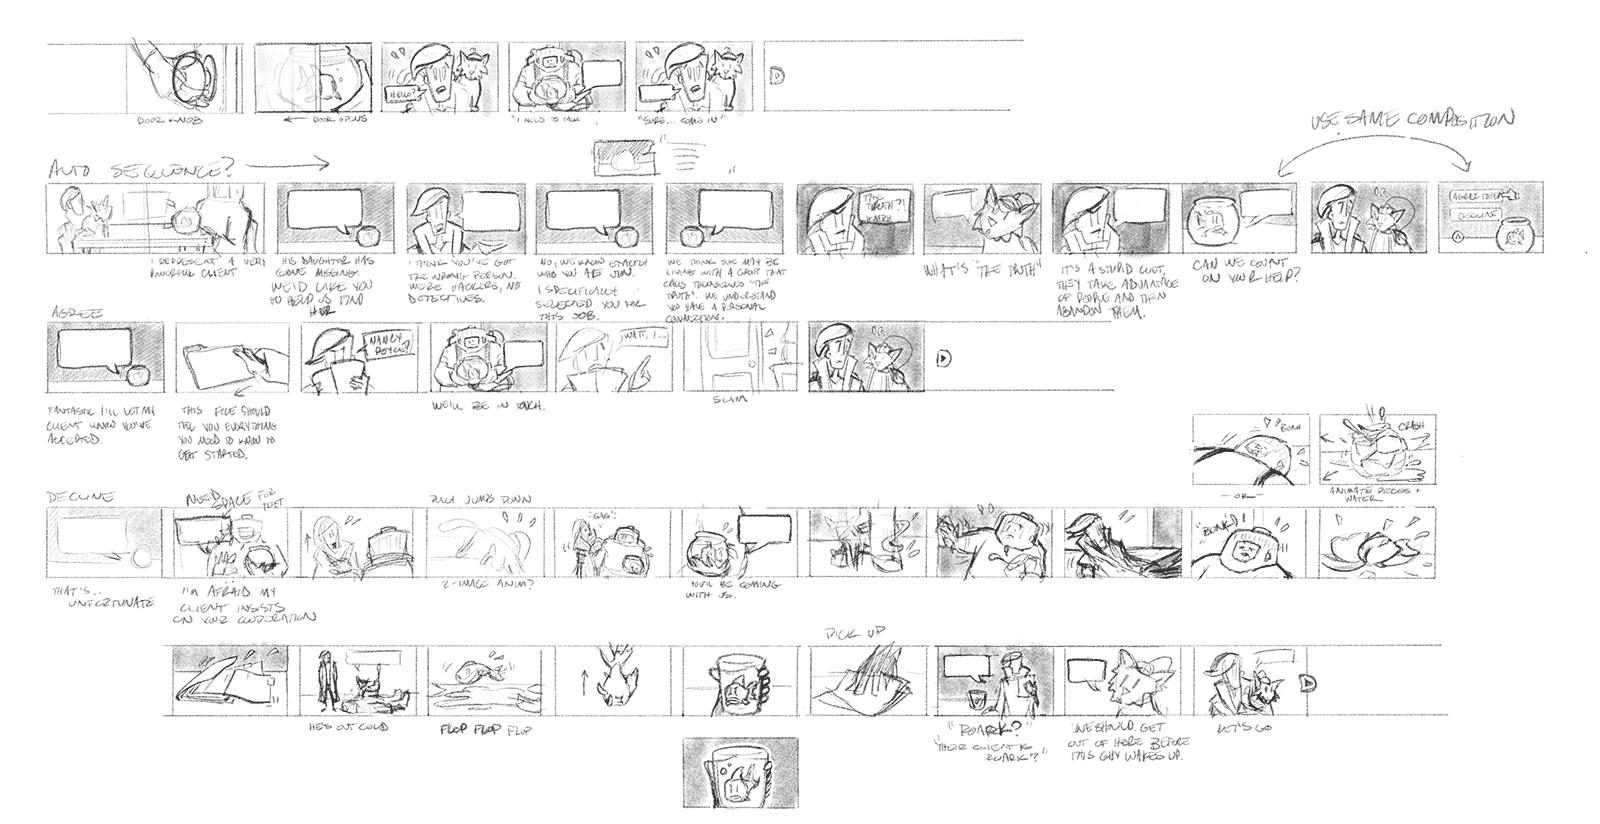
Next, I start sketching out the scenes in Procreate:

Here I’m trying to plan out every panel in a scene or a group of scenes. The sketches are rough, but I’m mapping out all the panel dimensions, artwork and layouts, any animations or interactive elements I want to include, as well as the scroll direction and whether the sequences should be auto or manually scrolling.

This is a super helpful part of the process because I can start to see the story pacing and how adjacent panels will relate to one another. This is the point where I can see where I need to add extra panels or sequences to make the story come together. I also often decide to break up a sequence into smaller sequences in order to switch scroll direction or add a story branch point.
Step 3: Drawing Individual Panels
Once I have a sequence sketched out I can start drawing the individual panels in more detail.

I do these in Procreate at actual size (400 × 240 for most panels). I use Procreate for this mostly because it’s familiar. It feels fast and fluid and I feel like I can keep a lot of the hand-drawn qualities in the artwork. I haven’t had much luck trying to draw directly into a pixel-art app. Everything comes out clunky and computery. I’ve recently seem some other folks doing pixel art in Procreate. That’s something I want to try, but I don’t want to switch my process in the middle of a big project like this.
Step 4: Final Pixel Art
Now I bring the Procreate drawings into Pixaki to trace over them to create the final pixel art. At this stage I’m also breaking up the panels into separate layers for animation, interactivity, or just parallax separation.
![]()
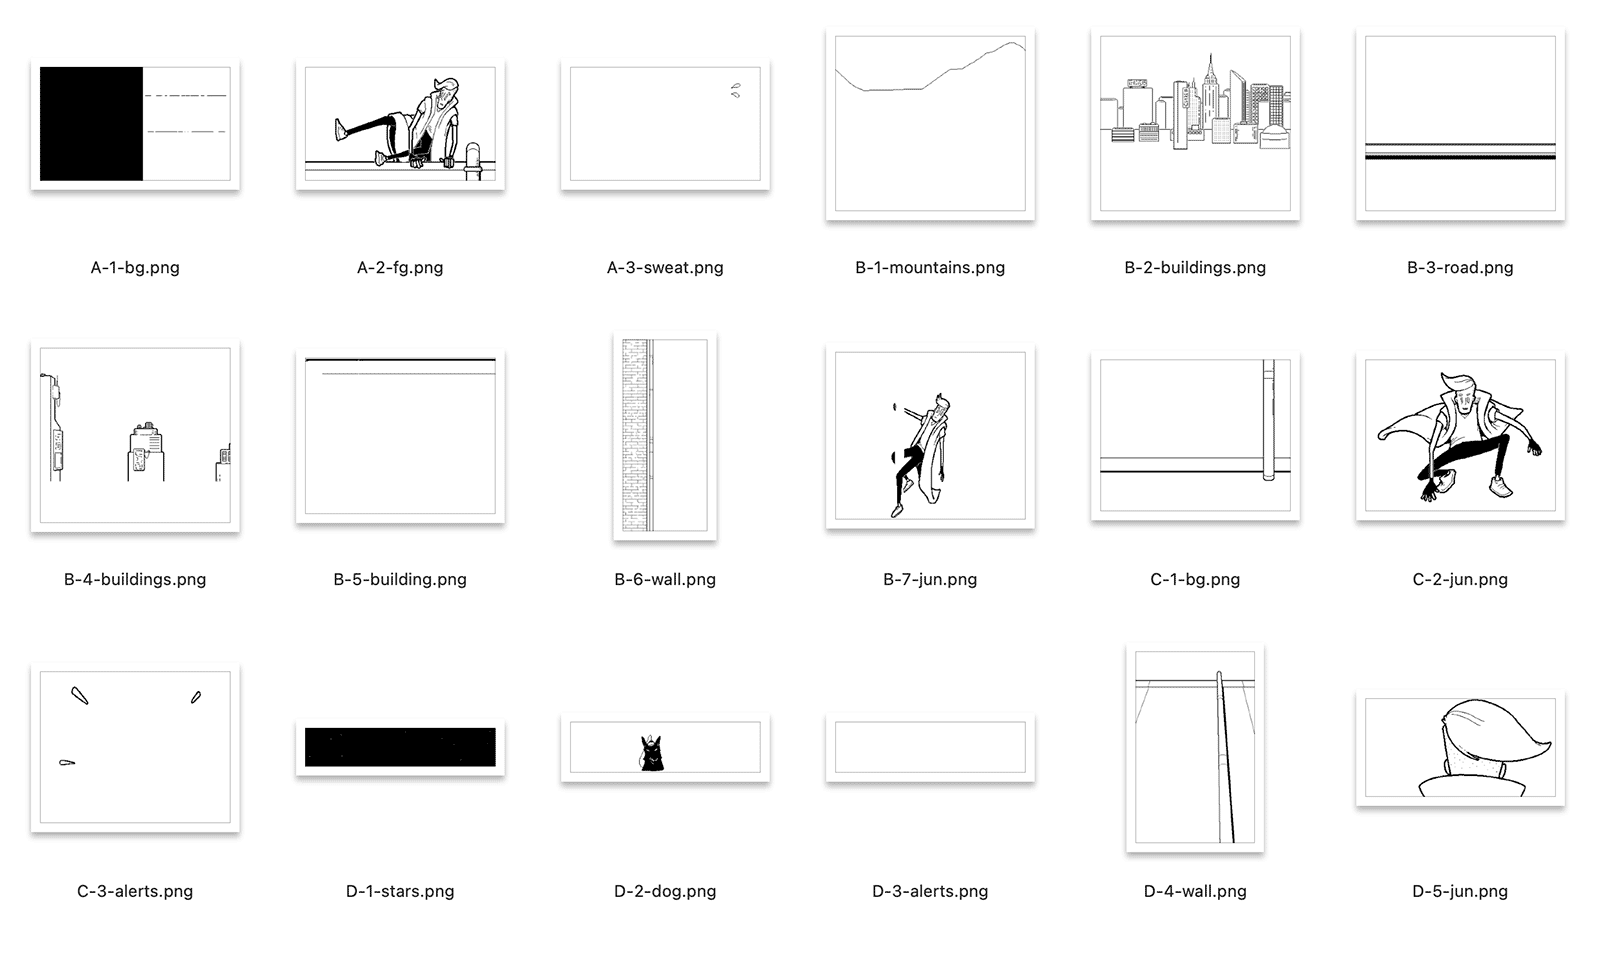
Step 5: Exporting Assets
The final step doesn’t involve much creativity, just opening the layered files from Pixaki in Photoshop and exporting all the layers and individual PNG images. These are the assets that get loaded into Panels to create the actual comic.
