My previous Panels comics (The Botanist, To Dust, and Illumination) were all created with very minimal dialog. All the text in those comics appeared on in-game screens or signage, so I never had to think about how to handle character dialog. Fauna, on the other hand, has a much more complex storyline that relies on the characters speaking to each other frequently to communicate what’s happening and move the plot forward
Initial Approach
My original plan was to create text layers in Panels and add some new functionality to draw speech bubbles dynamically around the text. This would make it easy to add a speech bubble to a panel, quickly edit it, and even change the wording based on player choices.
Font Creation
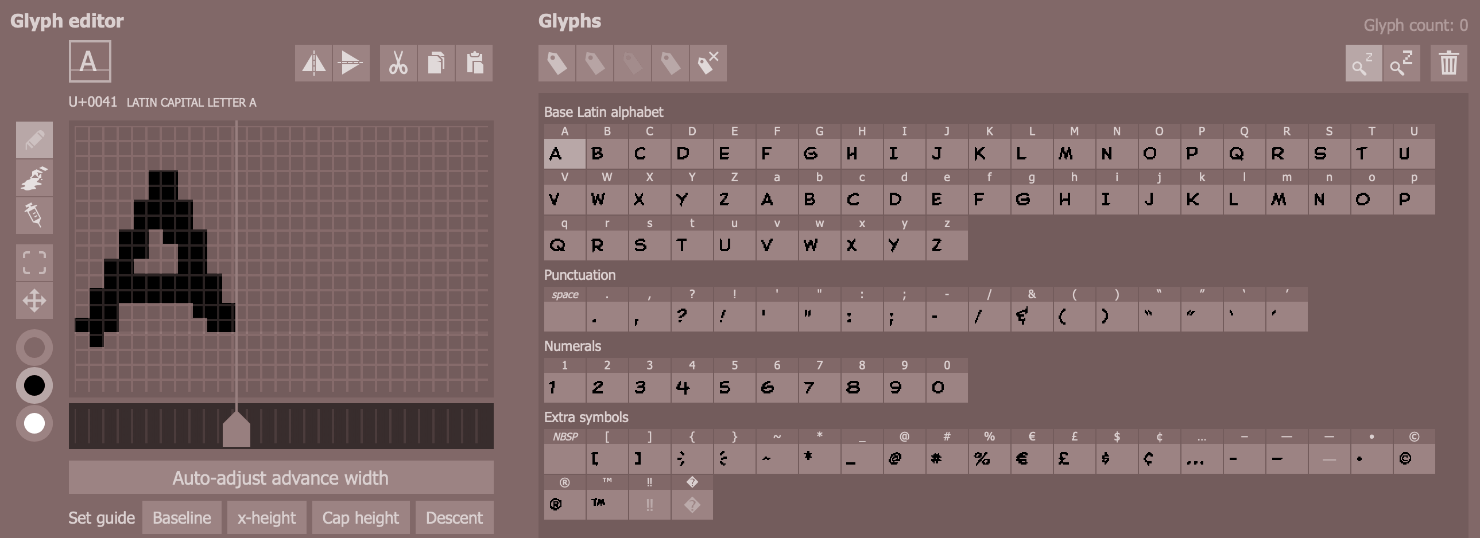
Since text layers are dynamic, I need a Playdate font to draw them at runtime. I wanted to use a comic-style font to match the hand-drawn style of my artwork, but most of the pixel fonts I could find are very geometric and computery, so I decided to create my own.
I really like Comicraft’s Samaritan font so I based my custom Playdate font on that design, using Tophat to convert the OTF into a bitmap pixel font.

It took a few iterations to find the right size. I wanted to make it as small as possible (to fit more text on screen) while still maintaining the readability and style of the font. Once I settled on the size, I manually cleaned up all the glyphs to remove stray pixels and make all the characters look consistent and properly spaced when rendered.
I couldn’t get a bold version to work at this size, but I did make an italic variant that looks pretty nice.

Problems
With my new font ready, I started thinking through how to actually implement dynamic speech bubbles in Panels.
It would be easy enough to draw a rounded rectangle behind the text, but how should I add the tail? I’d want to have the flexibility to have the tail attach to any of the four sides of the bubble, so that would need to be something I could specify for the layer. I also might want to move the tail along any of those sides, so I’d need to set either a pixel or percentage position for the tail. But the tails might also need to be different lengths, or point in different directions, or sometimes have different curvature depending on the positioning of the characters in the frame.

I could expose all those variables in the layer definitions (at minimum: three anchor points and two control points for the curves), but how would I know what values to use? Figuring it out through trial and error in the Playdate simulator would be too slow to be practical (waiting to build and run between each change). I’d probably need to draw the bubble in Photoshop or some other tool so I could take the measurements of where I wanted to add the points. At that point, I’d already have the bubble drawn and positioned with the text in it. If I’m doing that, I might as well just export it as an image and skip all the dynamic stuff entirely.
Current Workflow
So that is more or less my current workflow: I create each speech bubble manually as an image layer that gets exported with the rest of the panel art.
I have the bubble drawn as a vector round-rect and a vector tail graphic, so I can easily resize, reposition and point the tail wherever I want. Both vectors are grouped with a stroke applied to the group, so it looks like one single shape.

The upside of this system is that I have complete control of the bubble shapes and text alignment. I don’t often need to change them from the standard shape, but it’s nice that I can do fancy things when I want.

About That Font
One downside is that the normal Samaritan font doesn’t pixelate cleanly in the graphics editor the way my custom Tophat version does on Playdate. So instead of typing directly into the bubble, I create the text in a small Playdate project using my custom font, run the project, save a screenshot, and then drag that image into the bubble in Affinity Photo.
This is annoying and tedious and stupid. It felt like an acceptable compromise at first (certainly easier than having to manually measure and input 5 points for each bubble), but now that I’ve done it hundreds of times—with hundreds more to go—I really wish I had found a better solution.
Constraints
There are also some unexpected artistic constraints that come from working on such a small screen.
I’ve found I need to be careful with my panel compositions and character placement to ensure that there is enough room for a speech bubble in the scene (if required). This can be kind of tricky because I don’t know the exact size of the bubble when I’m creating the drawings on my iPad (the text gets added in a later step done on my computer).
I also need to be really particular about how I write the dialog, so the bubbles don’t get too big to fit in the panel. I’m finding I often end up rewriting dialog to make it fit, or just to make the word breaks more visually pleasing.
The other thing I’ve noticed is that it feels strange if the bubbles have too much parallax. They start to drift too much and can overlap the character, or just feel disconnected from the speaker. I still like to have them separate a little bit to add depth, but usually keep it within ±0.05 of the character’s parallax value.
A Better Way?
I still feel like there has to be a less tedious way to handle dynamic speech bubbles in Panels, but at this point I think I’m committed to this handmade approach for the rest of this project.